请注意,本文编写于 530 天前,最后修改于 530 天前,其中某些信息可能已经过时。
目录
searxng部署
首先需要克隆searxng的仓库
bashgit clone https://github.com/searxng/searxng-docker.git
随后进入
bashcd searxng-docker
随后编辑docker-compose.yaml,将其中的ports部分替换为0.0.0.0,编辑好的文件应当是这样的
注意此处使用了毫秒镜像提供的docker镜像服务
yamlversion: "3.7"

services:
  redis:
    container_name: redis
    image: docker.1ms.run/valkey/valkey:8-alpine
    command: valkey-server --save 30 1 --loglevel warning
    restart: unless-stopped
    networks:
      - searxng
    volumes:
      - valkey-data2:/data
    cap_drop:
      - ALL
    cap_add:
      - SETGID
      - SETUID
      - DAC_OVERRIDE
    logging:
      driver: "json-file"
      options:
        max-size: "1m"
        max-file: "1"

  searxng:
    container_name: searxng
    image: docker.1ms.run/searxng/searxng:latest
    restart: unless-stopped
    networks:
      - searxng
    ports:
      - "0.0.0.0:8080:8080"
    volumes:
      - ./searxng:/etc/searxng:rw
    environment:
      - SEARXNG_BASE_URL=https://${SEARXNG_HOSTNAME:-localhost}/
      - UWSGI_WORKERS=${SEARXNG_UWSGI_WORKERS:-4}
      - UWSGI_THREADS=${SEARXNG_UWSGI_THREADS:-4}
    cap_drop:
      - ALL
    cap_add:
      - CHOWN
      - SETGID
      - SETUID
      - DAC_OVERRIDE
    logging:
      driver: "json-file"
      options:
        max-size: "1m"
        max-file: "1"

networks:
  searxng:

volumes:
  caddy-data:
  caddy-config:
  valkey-data2:
然后在.env文件中增加一行配置url,注意该文件是隐藏的
envSEARXNG_HOSTNAME=localhost:8080/
随后编辑searxng文件夹下的settings.yml,在终端中进入searxng文件夹
bashcd searxng
随后创建一个密钥(命令来自于Kaku的个人博客)
bashsed -i "s|ultrasecretkey|$(openssl rand -hex 32)|g" searxng/settings.yml
然后编辑settings.yml,使它应当是这个样子,这个配置只启用了必应搜索引擎
yml# see https://docs.searxng.org/admin/settings/settings.html#settings-use-default-settings
use_default_settings:
  engines:
    keep_only:
      - bing
server:
  # base_url is defined in the SEARXNG_BASE_URL environment variable, see .env and docker-compose.yml
  secret_key: "<这一行不要动>"  # change this!
  limiter: false  # can be disabled for a private instance
  image_proxy: true
ui:
  static_use_hash: true
redis:
  url: redis://redis:6379/0
search:
  formats:
    - html
    - json
engines:
  - name: bing
    disabled: false
使用docker compose命令启动容器
sudo docker compose up -d
这里目的是创建容器,创建成功后它是运行不起来的,把他关闭
sudo docker stop searxng
创建一个uwsgi.ini文件
touch uwsgi.ini
编辑它,内容为
ini
[uwsgi]
# Who will run the code
uid = searxng
gid = searxng

# Number of workers (usually CPU count)
workers = %k
threads = 4

# The right granted on the created socket
chmod-socket = 666

# Plugin to use and interpreter config
single-interpreter = true
master = true
plugin = python3
lazy-apps = true
enable-threads = 4

# Module to import
module = searx.webapp

# Virtualenv and python path
pythonpath = /usr/local/searxng/
chdir = /usr/local/searxng/searx/

# automatically set processes name to something meaningful
auto-procname = true

# Disable request logging for privacy
disable-logging = true
log-5xx = true

# Set the max size of a request (request-body excluded)
buffer-size = 8192

# No keep alive
# See https://github.com/searx/searx-docker/issues/24
add-header = Connection: close

# uwsgi serves the static files
# expires set to one year since there are hashes
static-map = /static=/usr/local/searxng/searx/static
static-expires = /* 31557600
static-gzip-all = True
offload-threads = 4

# Cache
cache2 = name=searxngcache,items=2000,blocks=2000,blocksize=4096,bitmap=1
将它复制到docker容器内
bashsudo docker cp uwsgi.ini searxng:/etc/uwsgi
然后重新启动docker容器
sudo docker compose up -d
searxng 服务就运行成功了
在open-webui中连接searxng
来到管理员面版,转到设置-联网搜索,启用它,并选择联网搜索引擎为searxng
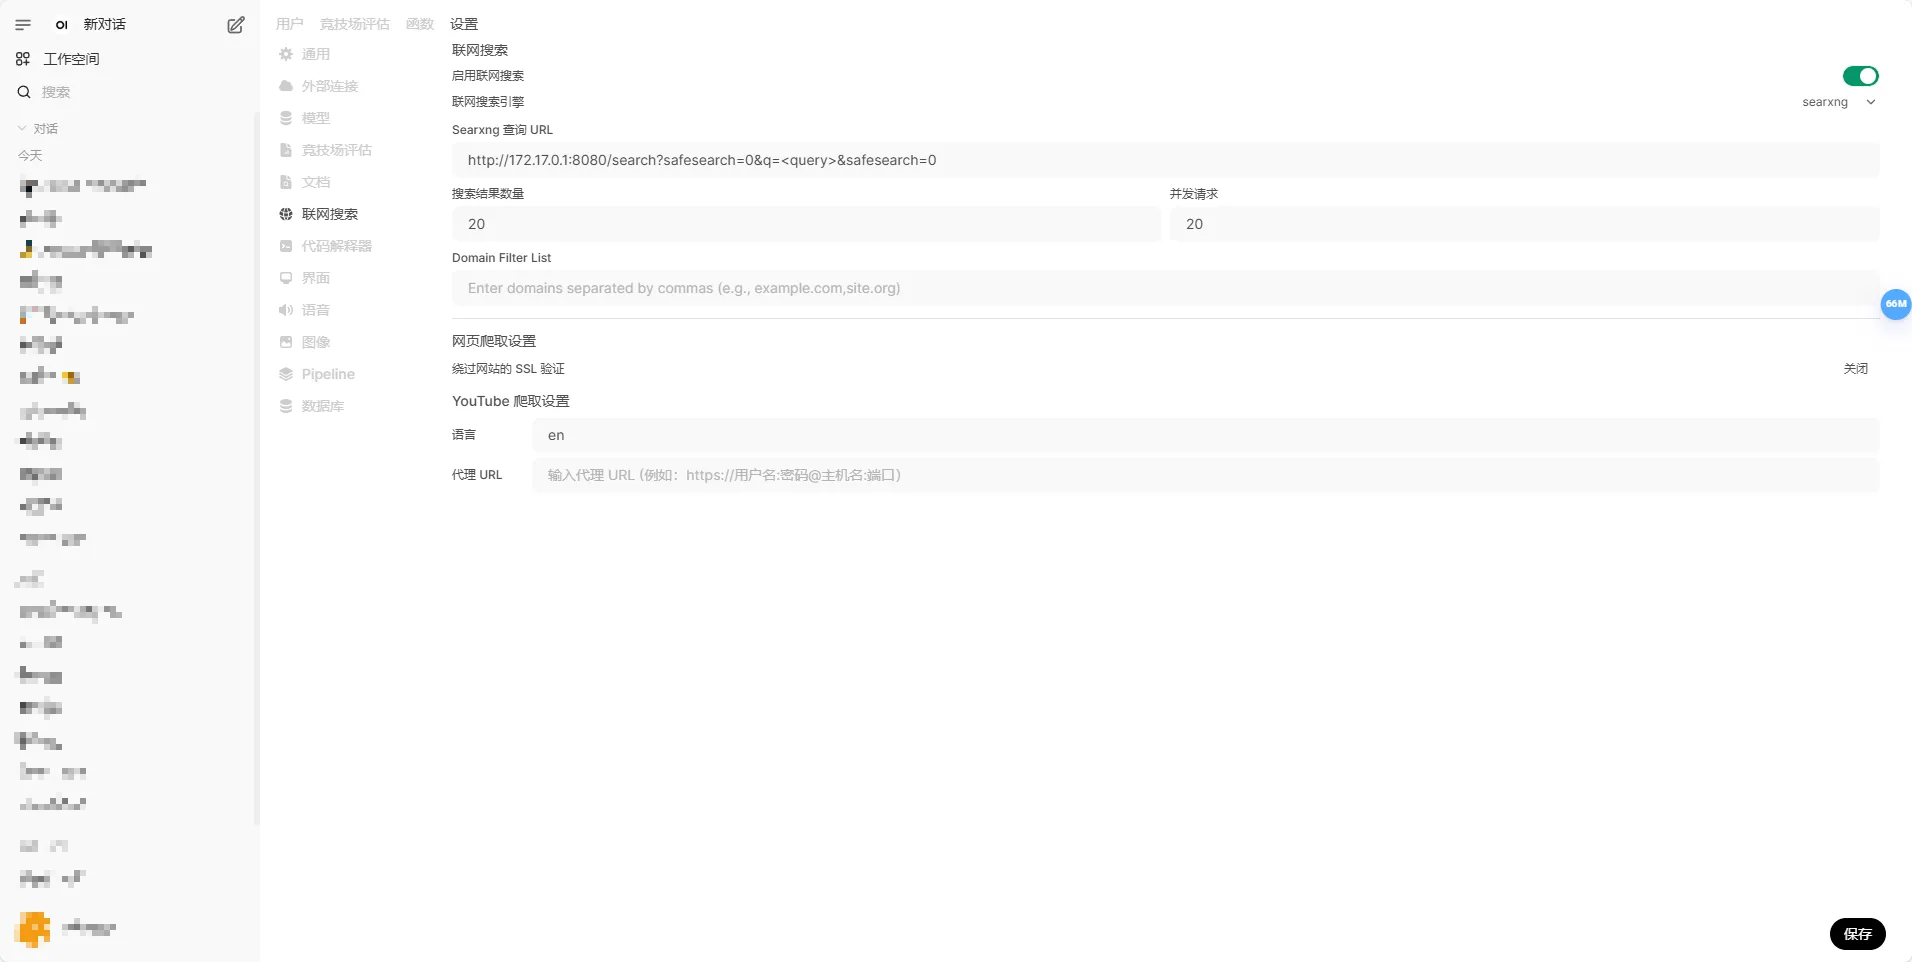
将Searxng搜索URL设置为
urlhttp://172.17.0.1:8080/search?safesearch=0&q=<query>&safesearch=0
其中的172.17.0.1是docker容器宿主机的默认IP地址。点击保存按钮后,转到设置-界面
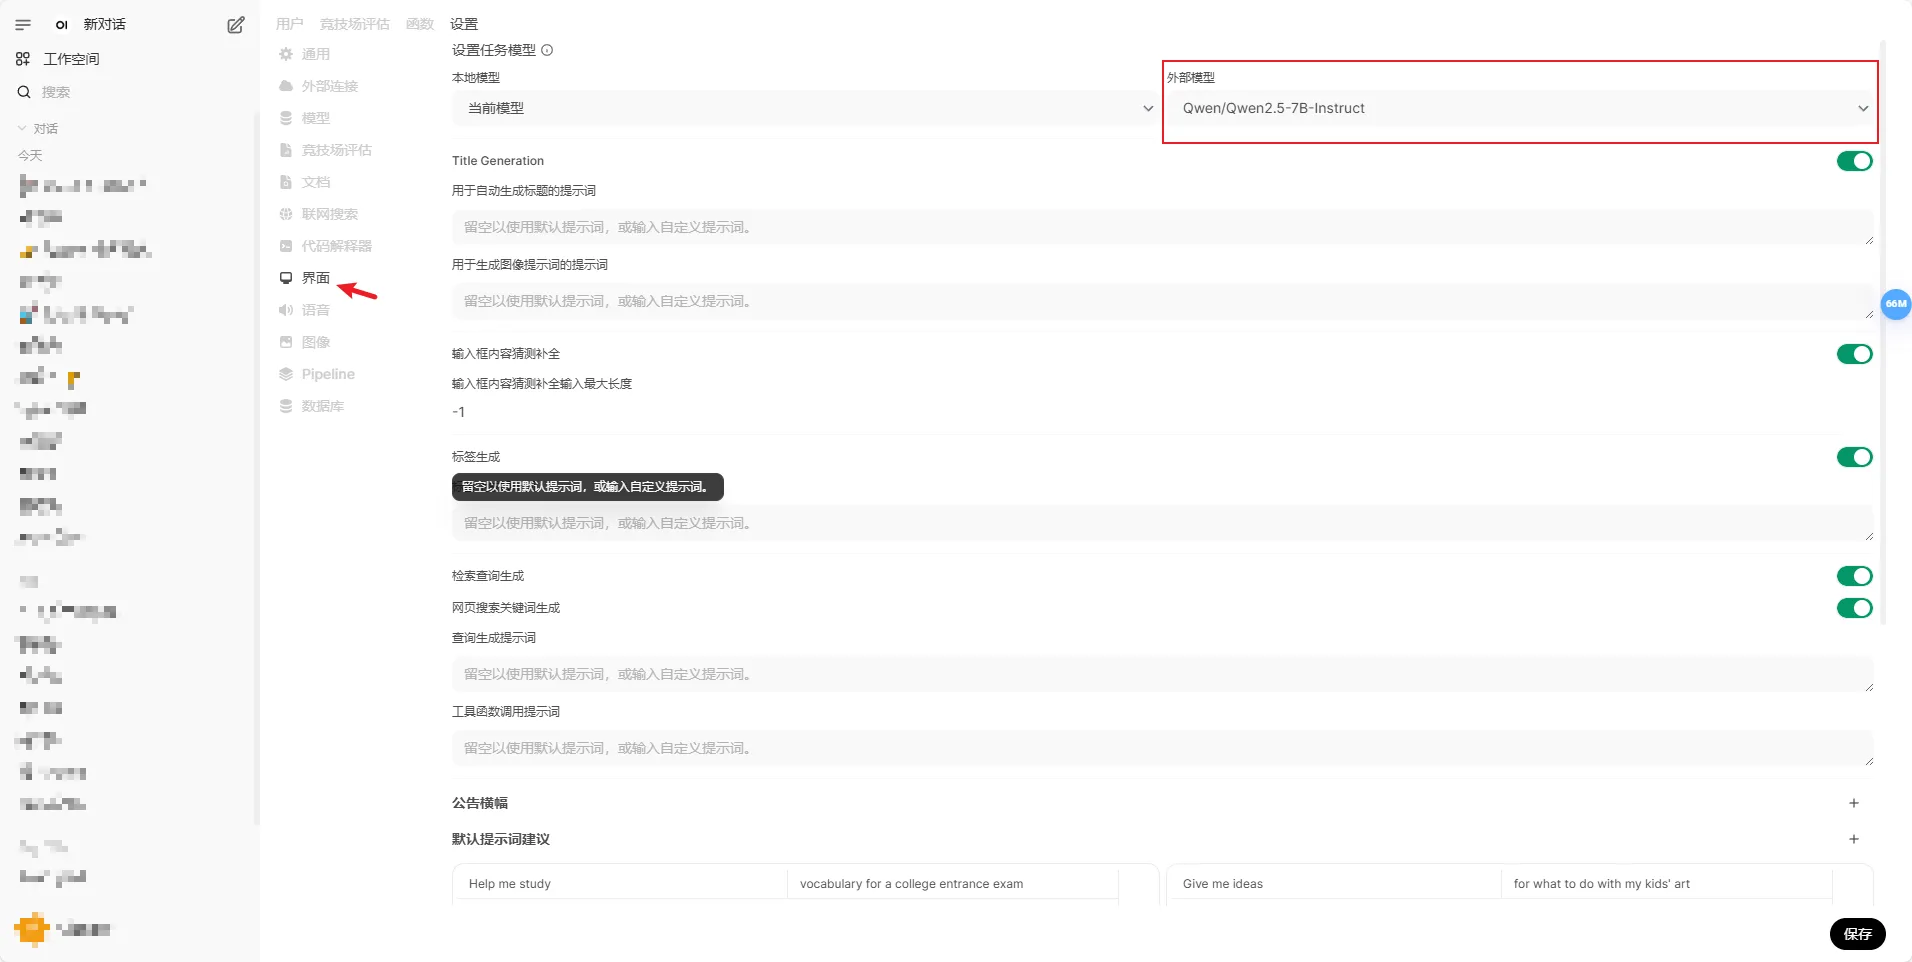
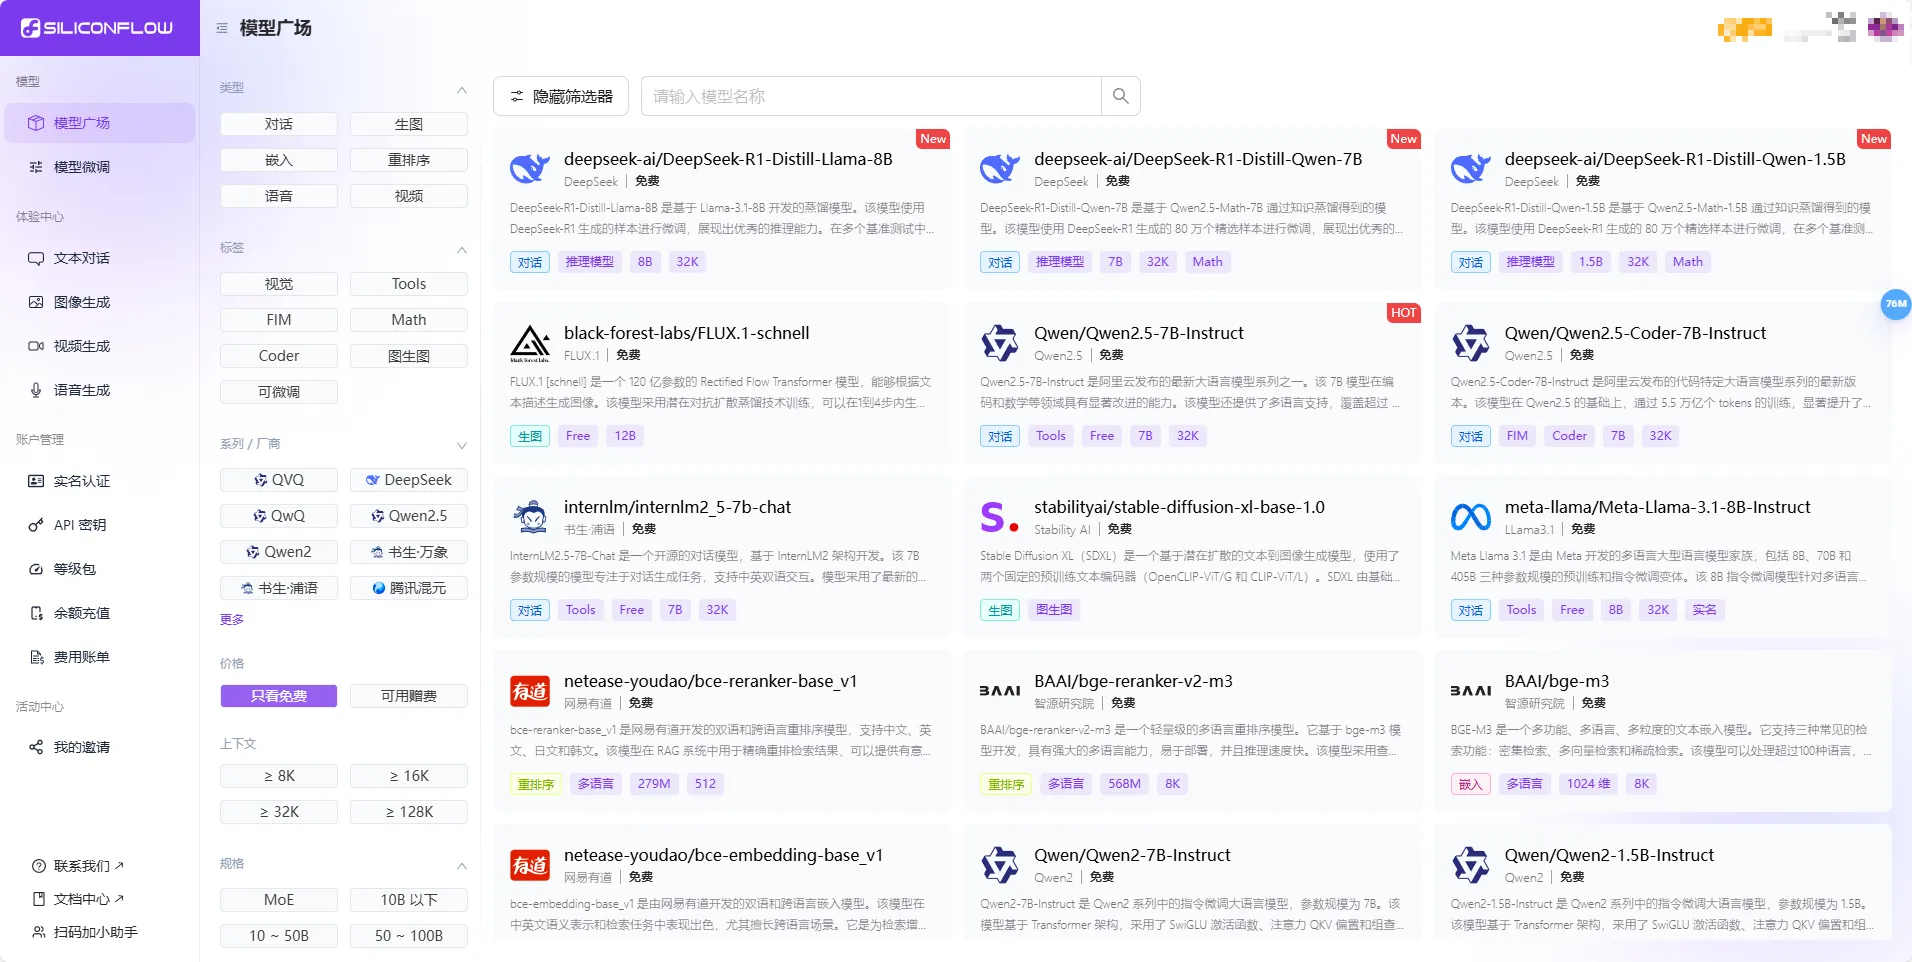
将这里的外部模型改为除了R1之外的其他模型。这个模型是用于生成搜索关键词的,生成速度需要比较快,所以R1是不合适的。这里选用了硅基流动的免费小模型,速度快还不收钱,任君选择
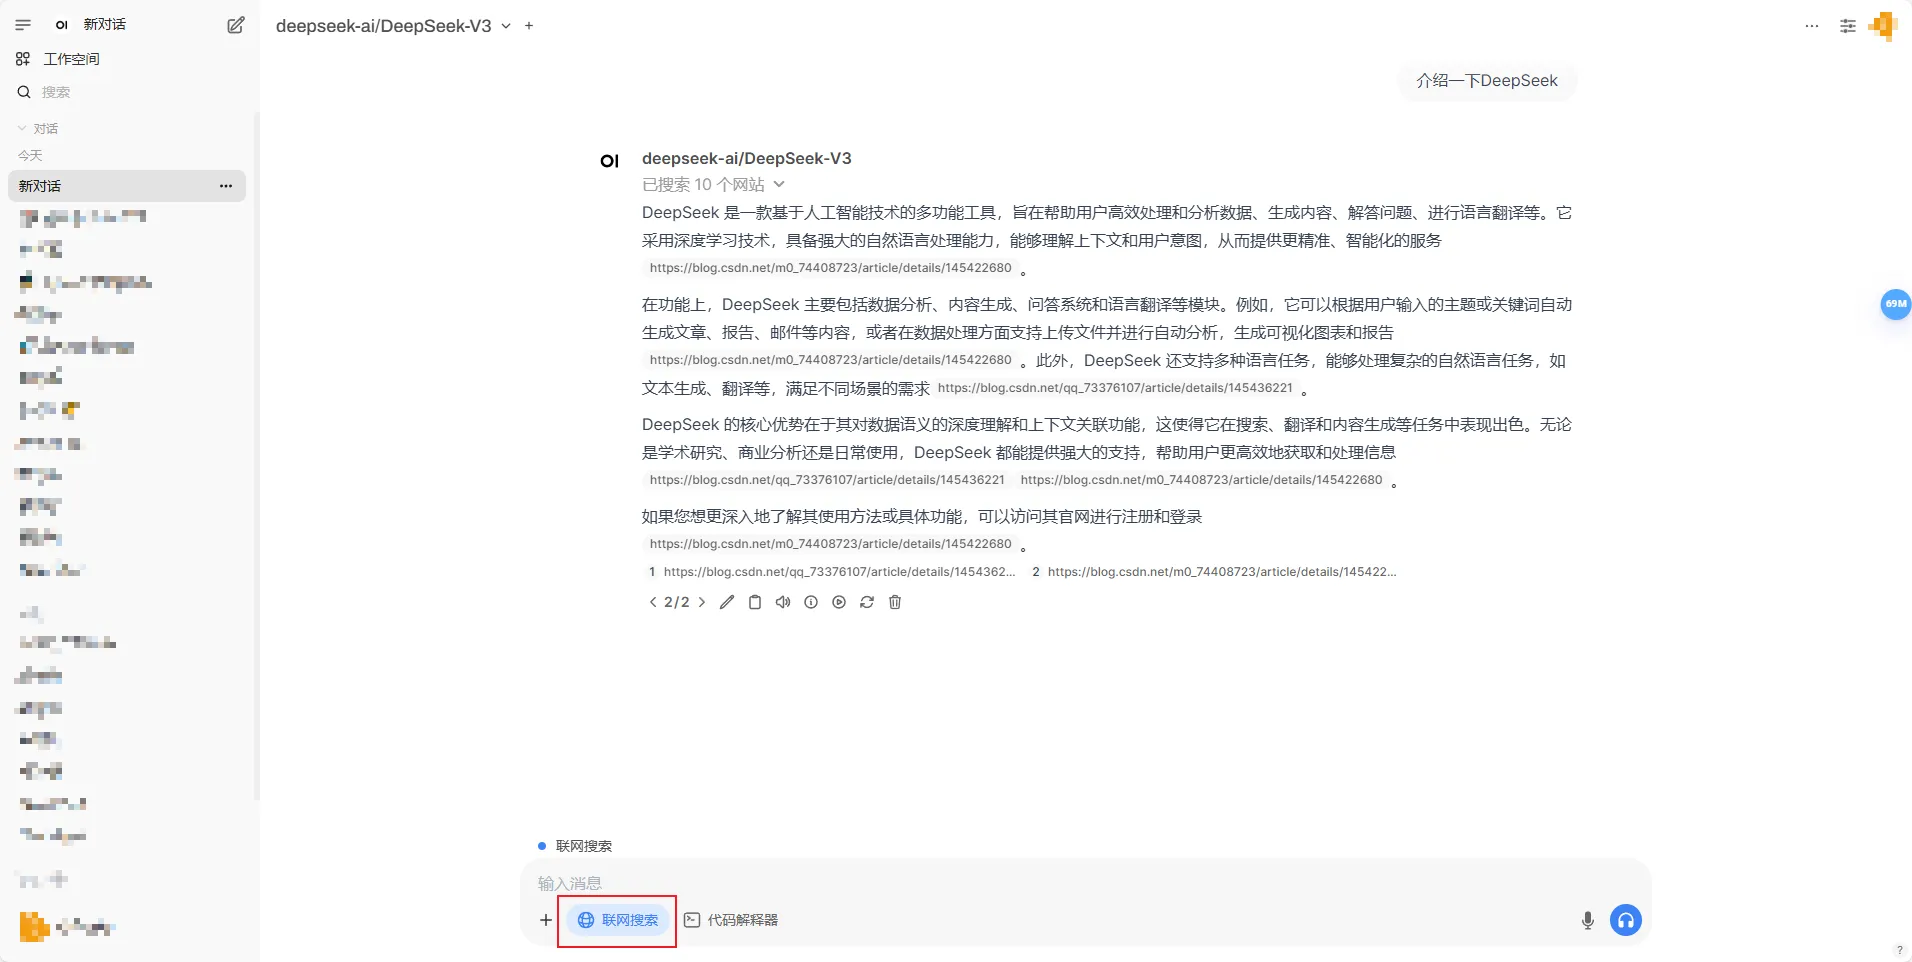
再点击右下角的保存按钮,联网搜索就配置完成了。在主界面点亮联网搜索即可启用
本文作者:GBwater
本文链接:
版权声明:本博客所有文章除特别声明外,均采用 BY-NC-SA 许可协议。转载请注明出处!
目录